
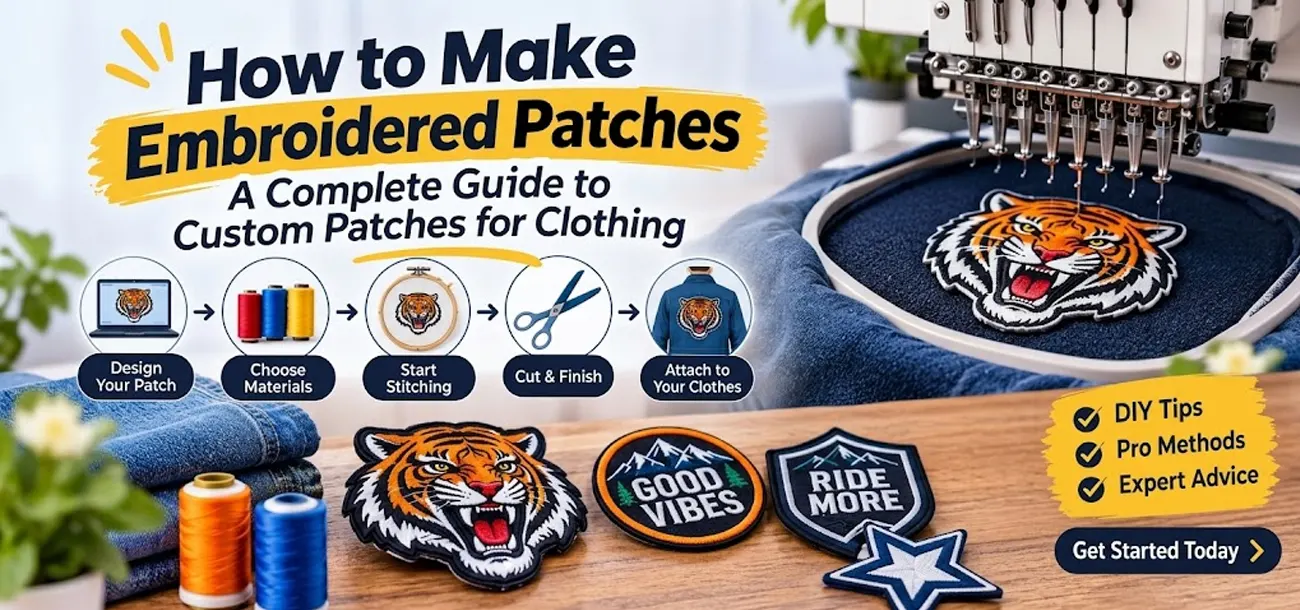
Embroidery patches are an excellent way to personalise clothing, build a brand, and create an original look for items. Whether you want them on denim jackets, hoodies, school uniforms, workwear, or backpacks, they can be used in many ways. Personalisation includes adding names, logos, graphics, symbols, or creative designs to different fabric items.
This guide will show you how to Make Embroidered Patches at home or how professionals create bespoke designs. We’ll show you everything you need to know about the materials needed, the embroidery process, backing options, and how to attach the patch.
While creating patches can be a fun project, you will need the correct tools, materials, and finishing to create professional-looking patches.
What Are Embroidered Patches and How Are They Made?
Embroidery patches are decorative fabric items that have been embroidered with a design. Usually, they will have a base of fabric and then embroidery threads to create a logo, pattern, name, image, or other graphic. Finally, the design will be cut out to create the desired shape and attached to the correct backing.
They can often be found on various items of clothing such as jackets, uniforms, bags, hats, workwear, etc. They can also be used by businesses to show off their logos and create brand uniformity.
Most embroidery patches are created in 5 steps:
- Create your design and decide on the patch size.
- Choose the correct fabric and embroidery threads.
- Digitise your design so it can be used on the embroidery machine.
- Embroider the design.
- Cut and finish the patch with the correct backing.
The quality of your embroidered patch will depend on the density of your stitching, the quality of threads, fabric, colours, and finishing.
What Materials Do You Need to Make Your Own Patches?
Before you create your own patches, ensure you have the correct materials. This will make it easier to create a clean finish.
Below are the basic materials needed.
1. Fabric base
The base of your patch will be fabric. Twill is often used as it can easily be embroidered. Felt and other stable fabrics can also be used.
Ensure the fabric you choose can hold the design and won’t stretch.
2. Embroidery thread
Embroidery threads create your design on the fabric. You can use different colours to create letters, logos, patterns, and detailed graphics.
Use quality embroidery threads with consistent colours to ensure neat stitches.
3. An embroidery needle
An embroidery needle will help you create clean stitches. Ensure your needle is the right size for your threads and fabrics.
4. Embroidery Hoop
An embroidery hoop will help keep your fabric in place whilst you create your design.
5. Scissors
It can be helpful to have sharp fabric scissors to cut your patch into the correct shape. Small embroidery scissors can help remove loose threads.
6. Stabiliser
An embroidery stabiliser will help to keep your fabric in place whilst embroidering. This will reduce wrinkles and distortions.
7. Backing Material
Depending on how you want to attach your finished patch, you can choose from:
- Heat seal from backing
- Sew-on
- Hook and loop
- Adhesive (depending on the application)
Ensure you choose the correct backing for your fabric and application.
How to Make Embroidered Patches Step-by-Step
Creating embroidered patches requires patience. Simple designs can be created by hand, or use an embroidery machine to achieve a more consistent finish.
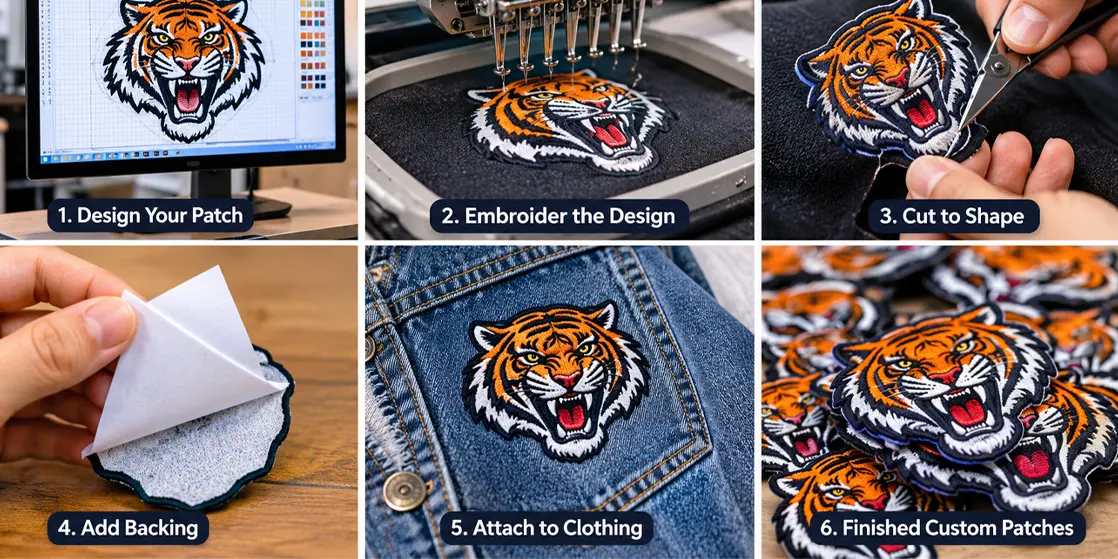
Below are the steps to creating your own patch:
Step 1: Prepare Your Patch Design
Decide what you want your patch to look like. This could be adding a name, company logo, embellishment, initials, or a simple graphic.
Think about the size of your patch. Small patches may struggle to fit very small text or detailed designs.
Some tips for designing:
- Keep your text easy to read.
- Choose colours that work well together.
- Avoid using too many small details.
- Ensure your design isn’t embroidered.
- Ensure any key elements are easy to spot.
If you’re creating a logo patch for your business, ensure you use the correct colours and graphics for your brand.
Step 2: Choose Fabric and Thread
Choose a stable fabric to create your patch. Twill is often used for bespoke embroidered patches.
Choose embroidery thread colours. If you’re looking to create a professional branded patch, ensure the colours are consistent.
Think about what you want your patch for. If it’s for a jacket, you may need a different size and finish than for a cap or uniform.
Step 3: Transfer the Design to the Fabric
Use the correct method to transfer your design onto your fabric. This could be done with a washable fabric pen.
Secure your fabric in the embroidery hoop. Ensure your fabric is flat and not stretched.
If using an embroidery machine, you will need to digitize your design.
This will tell the embroidery machine where to place the stitches, which direction to stitch, and how to embroider different parts of your design.
Step 4: Start Embroidering the Design
If you’re doing this by hand, choose the right stitches for the different parts of your design. Backstitch can help with outlines, and satin stitch for filling in letters and shapes.
If using an embroidery machine, follow your digital design. Ensure that your fabric stays stable.
Ensure that you:
- Have consistent stitch density.
- Don’t tighten your threads.
- Check that there aren’t any gaps in your design.
- Be careful when removing loose threads.
- Ensure your text is easy to read.
Having a clean embroidery pattern will give you a professional finish.
Step 5: Cut the Patch into Shape
Once you’ve finished embroidery, remove your fabric from the hoop. Check your design.
Using sharp scissors, cut around your design. Ensure you leave enough space around the edges to create a neat border.
You can create a variety of shapes.
- Round patches.
- Square patches.
- Rectangular patches.
- Shield-shaped patches.
- Custom logo patches
If using an embroidery machine for patch finishing, you can create a clean finish with a merrowed edge or laser-cut edge.
Step 6: Finish the patch edges
For a patch to be durable, this is essential. If your edges are rough, they can affect the look of your patch and cause fabric fraying.
If you’re creating your patch by hand, you can carefully stitch around the edges. Professional manufacturers may use Merrow borders.
Check that your patch has no loose threads, uneven edges, or missing stitches.
How to Make Custom Clothing Patches?
Custom patches can be an excellent way to add personality to your clothing. They can also be an excellent way for businesses, clubs and organisations to create a recognisable brand.
First, decide what clothing item you want your patch on.
Examples include:
- Denim Jackets – Large embroidery graphics, text and embellishments can create a personalised look.
- Hoodies/Sweatshirts – Small logo patches can be added to add branding.
- Work Uniforms – Company names, employee roles, and logos can be added using embroidery.
- Backpacks – Custom shapes, initials, and colourful designs can identify your bags.
- Hats/Caps – Small embroidery designs work well. Just ensure you adapt your design to fit.
Think about the fabric, thickness, and what you want your patch for. Ensuring it is the right size and has the correct backing will help it look better and stay secure.
How to Make Your Own Iron-On Embroidered Patch
Iron-on patches are an excellent option to add embroidered designs without sewing them.
First, you’ll need an embroidered design. You’ll then need a heat-activated adhesive backing.
Below are the steps:
Step 1: Prepare the embroidered patch
Ensure your embroidery patch is clean and finished. Remove any loose threads.
Step 2: Select the Heat-Activated Backing
Choose an iron-on adhesive. This should be suitable for fabric patches.
Step 3: Apply the adhesive backing
Follow the instructions on your adhesive. Some may need to be heated, and others may need a certain temperature and pressing time.
If required, protect your embroidery with a suitable pressing cloth.
Step 4: Allow the Patch to cool.
Leave your patch to cool. Follow the instructions in your adhesive. Ensure the backing is secure.
Step 5: Attach the patch to clothing.
Place your patch where you want it on your clothing. Follow the instructions for heat and pressing.
Not all fabrics are suitable for ironing. Delicate fabrics, leather, nylon, and heat-sensitive synthetic fabrics may need different methods.
If your garments will be washed regularly or heavily used, you may want to sew around your patch for extra security.
How to Make Your Own Iron-on Decals
If you’re looking for how to create your own iron-on decals, it’s helpful to know the difference between decals and embroidery patches.
Iron-on decals are usually created using printed or cut heat transfer. While embroidery patches have a stitched design using fabric.
Both can be applied using heat but require different materials. Choose the most appropriate option for your design and clothing.
How to Make a Cloth Patch or Clothing Patch
A fabric patch can be created using fabric, threads, and basic sewing materials. You don’t always need an intricate embroidery design.
If you want a simple handmade clothing patch:
- Choose the right fabric for your patch.
- Draw your desired shape onto the fabric.
- Carefully cut out your fabric.
- Finish the edges by folding or finishing.
- Add any embellishment.
- Sew or use a suitable fabric adhesive to attach.
You can add initials, small patterns, or simple embroidery designs.
If you want a more intricate design, you can use an embroidery machine or a professional patch manufacturer.
How to Make an Embroidered Badge
An embroidery badge works in a similar way to an embroidery patch. It will have a stitched design on fabric. They can be used on uniforms, jackets, bags, and other clothing.
Start with a clear design and choose the right fabric and threads.
Transfer your design onto the fabric and complete the embroidery. Cut your badge into the desired shape and finish the edges.
You can also select different backing options depending on how the badge will be used.
Embroidery badges can be used in schools, clubs and businesses to add names, logos, team emblems and organisation details.
If you want to create multiple badges, it’s important to keep the size, colours and stitching consistent.
How to Get Custom Patches Made Professionally
Whilst creating your own patches can be a good option for small projects, often getting them professionally made will give you a more consistent result. If you want intricate designs or more patches, it’s often better to get them made professionally.
If you want to know how to get your patches made, start by preparing your design. A professional manufacturer can help you choose the correct fabric, threads, and border.
Step 1: Prepare Your Artwork
Ensure you have a clear logo, image, or design. Using high-quality artwork will make it easier to see what details you need.
Step 2: Select the Patch Size
Decide what width and height you want your patch to be.
If you want a small logo on a shirt, you’ll have different requirements than a large design on the back of a jacket.
Step 3: Choose the Patch Type
Think about what material and method you want to use.
Common options include:
- Embroidery – Raised design using stitches.
- Woven – Very detailed and small text.
- Chenille – Textured look.
- PVC – Flexible rubber look.
- Leather – Different material.
Step 4: Select the Backing
Choose whether you want sew-on patches, iron-on, or hook and loop.
Step 5: Review the Design and Place Your Order
Ensure the colours, size, spelling, and design are correct. If ordering multiple patches, ask about the quantity options, production times, and finishing options.
We can help you find custom patches for your clothing, branding, uniforms, etc.
Professionally made custom embroidery patches can help you create consistent designs without investing in embroidery equipment.
DIY Patches vs Professionally Made Custom Patches
Both options have their benefits. It will depend on how intricate your design is, what equipment you have, and how many patches you need.
| Feature | DIY patches | Professional patches |
|---|---|---|
| Equipment | Basic sewing or embroidery tools | Commercial embroidery equipment |
| Design | Best for simple designs | Suitable for detailed artwork |
| Production | Usually slower | More consistent production |
| Quantity | Suitable for small projects | Suitable for individual and bulk orders |
| Finishing | Depends on your skills | Professional finishing options |
| Best for | Personal crafts and experiments | Brands, clubs and organisations |
If you just need one simple patch, it can be a rewarding project to create yourself.
However, if you need matching patches for your business, school, clothing range, or club, it may be a more practical option to get them professionally made.
Common Mistakes to Avoid When Making Your Own Patches
Even simple patches can look messy if you don’t follow the correct steps during production.
Common mistakes include:
1. Choosing the wrong fabric.
Using stretchy or unstable fabric can cause issues whilst embroidering. Ensure you choose the correct base.
2. Using Too Many Small Details
Very small text and intricate designs may not translate well. Keep it simple and easy to read.
3. Incorrect thread tension
Too loose or tight stitches can affect your patch’s look. Check your tension.
4. Poor edge finish.
Unfinished edges can fray your fabric. Choose a suitable border.
5. Select the wrong backing
Not all fabrics are suitable for an iron-on patch. Ensure it is compatible.
6. Ignore the Final Application
Think about what you want to use your patch for. If it’s just for decoration and won’t be worn often, you may have different requirements.
Final thoughts
Knowing how to Make Embroidered Patches can help you create personalised designs for your clothing, accessories, businesses, and clubs. Using the right fabric, quality threads, and the correct backing, you can make simple patches at home. Experiment with different shapes and designs.
If you want intricate designs, consistent results, and more patches, it may be better to get them professionally made. Choosing the correct type, size, border, and backing will help you create the perfect finish.
Whatever option you choose, knowing how they are created will help you create a great design.

0 Comments on “How to Make Embroidered Patches: A Complete Guide to Custom Patches for Clothing”