
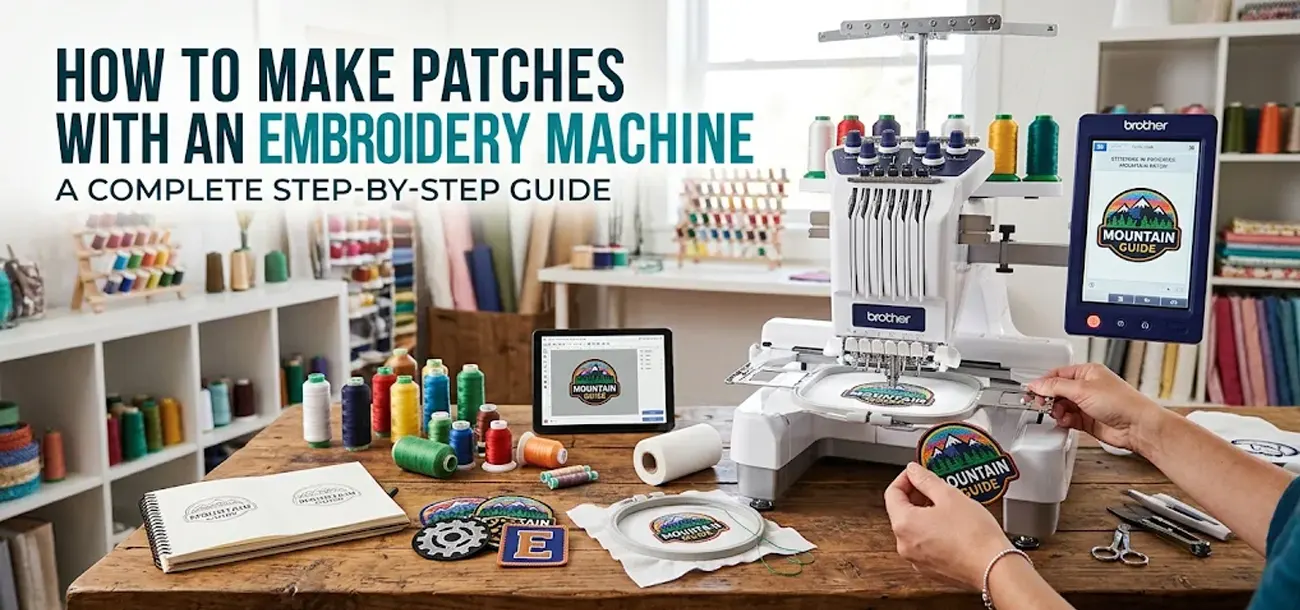
Creating embroidered patches is a popular way to customise items such as jackets, backpacks, uniforms, hats, and more. This can include adding names, logos, pictures, team designs, and creative designs. Using the right tools and materials, you can create beautiful and durable patches in your own home or a small embroidery room.
How to Make Patches with an Embroidery Machine: It helps to know each step of the process. You’ll need some good-quality patch fabric, embroidery thread, stabiliser, a design that has been digitised, and the right finishing materials. Your embroidery machine will sew your design onto your fabric; you can then cut and finish your patch.
This guide shows you everything you need to know when choosing your materials, setting up your embroidery machine, and sewing, cutting, and attaching your finished patch. Whether you’re a complete beginner or an experienced embroidery lover, these tips will help you get neater and more consistent results.
Can You Make Patches with an Embroidery Machine?
Can you create patches on an Embroidery Machine? Yes! Using either a home or commercial Embroidery Machine, you can create unique patch designs on the right fabric.
The most common way to create patches is by using the hoop technique. With a pre-programmed design, you can add outlines, placement stitches, embroidery, and borders.
You can make different types of patches, including:
- Name patches – embroidered patches that can be added to uniforms and workwear.
- Logo patches – great for businesses and clothing brands.
- Decorative patches – perfect for adding to jackets and backpacks.
- Military patches – perfect for clothing and accessories.
- Personalised patches – great for clubs, teams and organisations.
- Iron-on or Velcro patches – easy attachment
The type of machine, fabric, stabiliser, thread quality, and digitising will affect the outcome. Having the right embroidery design will be key. Ordinary embroidery files may not have the correct stitch order or border for a patch.
What Supplies Do You Need to Make Embroidery Patches?
Before we look at how to make embroidery patches with your machine, you will need to gather some supplies. Using the correct materials will make sure your stitching goes smoothly and help prevent any issues like puckering, loose threads, and uneven edges.
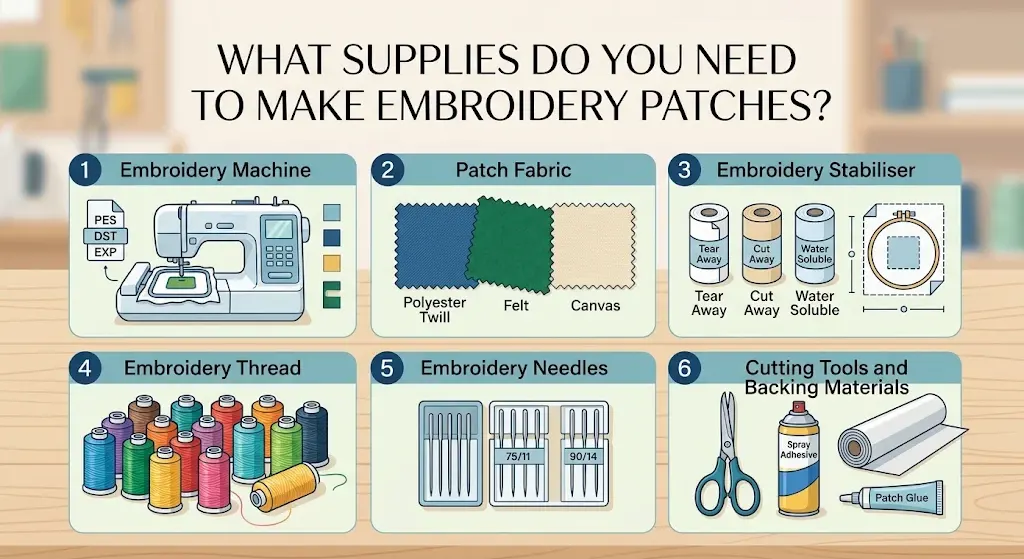
1. Embroidery Machine
The main piece of kit required to create your patch design. This will help control the needle in order to embroider.
Home machines are best for smaller projects, whilst commercial machines can be used for larger quantities. Before starting, check the embroidery field size to make sure you know the maximum size of your patch.
Ensure your Embroidery Machine can use a file type you have. Common file types include PES, DST, EXP & JEF. This depends on the brand and model of the Embroidery Machine.
2. Patch Fabric
The fabric will provide the base for your patch. You need a strong fabric that will withstand the stitches and can be cut.
Popular choices include:
- Polyester Twill – a popular choice for creating professional-looking patches.
- Cotton Twill – great for many basic patch designs.
- Felt – easy to cut and great for decorative patches.
- Canvas – strong fabric, great for bold designs and accessories.
- Denim – useful for casual and fashion-related patches.
Polyester twill is a great choice, as it will give your patch a firm surface and is suitable for many styles of embroidery.
3. Embroidery Stabiliser
Using a stabiliser will help control the fabric during the stitching. This will help reduce puckering.
There are a few different options:
- Tear Away – tear away the excess once you’ve finished stitching.
- Cut Away – will provide long-term support for your fabric.
- Water Soluble – will dissolve when exposed to water.
- Patch Film – designed for creating individual patches and some in-the-hoop techniques.
Depending on your fabric, stitch density, and design, choose the right stabiliser. Always check the manufacturer’s guidelines for the material.
4. Embroidery Thread
This will add colour, texture, and detail to your patch. Polyester embroidery thread is popular due to its strong qualities and range of colours.
Choose colours that match your design. Contrast colours will work well if you need text, borders or small details.
5. Embroidery Needles
Using the right embroidery needle will help your machine stitch through your chosen fabric and stabiliser.
Ensure you are using the correct needle size for your fabric, thread and machine. Refer to your manufacturer’s guidelines and replace any damaged or blunt needles.
6. Cutting Tools and Backing Materials
It’s best to have sharp embroidery or appliqué scissors to cut away any excess fabric. Other useful items include:
- Spray adhesive.
- Embroidery tape.
- Fabric clips.
Depending on how you want to use your patch, you may need:
- Iron-on backing.
- Sew-on backing.
- Hook-and-loop / Velcro backing.
- Heat seal.
- Patch fabric glue.
Having these items will help you create a neater patch.
How to Make Patches with an Embroidery Machine: Step-by-Step Process
Once you have all your supplies, you can start creating your own embroidered patches.
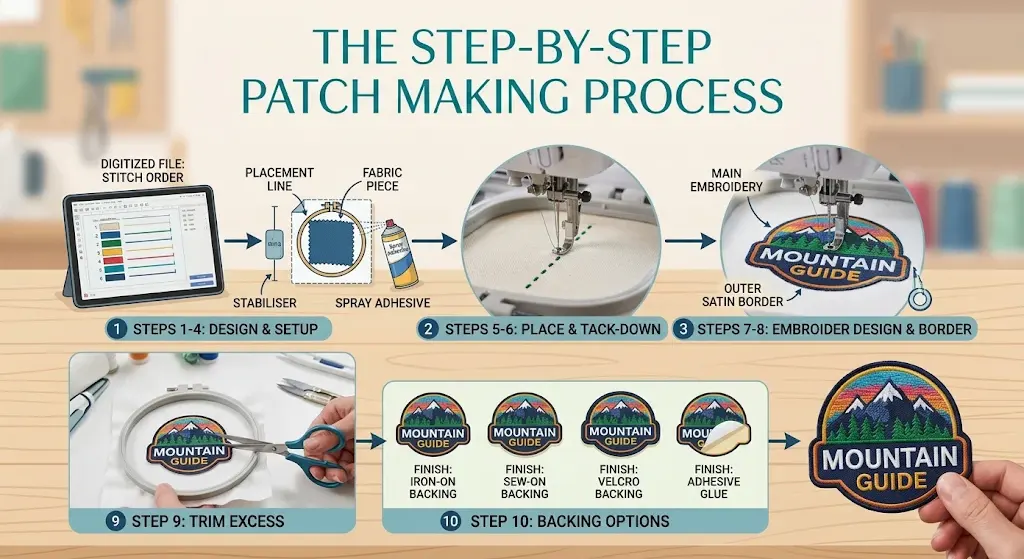
Follow the steps below:
Step 1: Create Your Patch Design
Decide what type of patch you would like to create. This could be a logo for your business, team logo, name badge, decorative design, or personalised design.
You can draw your design or create it using graphic design software. If you’re creating your first patch, keep it simple.
Consider:
- Choosing the right size.
- Choosing a shape. A circle, square, or rectangle would be best.
- Using easy-to-identify colours.
- Clear text.
- Avoid tiny details that won’t stitch well.
- Leave room for an outer border.
Simple designs tend to stitch better.
Step 2: Digitise the Design
This is an important step to convert your design into an embroidery file. Your machine will need instructions on what stitches to use.
Using embroidery digitising software, you can choose the type of stitches, colours of thread, direction of the stitches and position of the design.
Your file should be a patch-specific file. This should have the correct stitch order. Depending on how you’re creating your patches, it should have:
- Placement stitches.
- Tack-down stitches.
- Main embroidery.
- Outer border.
Having an outer border will help cover the edges of your fabric and keep your patch intact.
Use digitising software that is compatible or work with a professional embroidery digitiser. Ensure your design will fit within the embroidery field of your machine.
Step 3: Prepare the Fabric and Stabiliser
Cut your fabric to a little larger than your final design. Prepare your stabiliser depending on what type of patch you are creating.
If you are creating an in-the-hoop patch, you may wish to hoop your stabiliser. Place your fabric over the top during placement and tack down.
If creating another type of patch, you may hoop your fabric and stabiliser together.
Ensure your fabric is flat and secure. Avoid any wrinkling.
Use a spray adhesive to help keep your fabric in place. Follow the manufacturer’s instructions and don’t use too much.
Step 4: Set Up Your Embroidery Machine
Before starting your patch design, ensure your machine is set up.
Ensure you have:
- Threaded correctly.
- The correct embroidery needle inserted.
- The bobbin inserted.
- The correct hoop attached.
- A compatible file.
- Correct thread colours.
- Design size and position.
- Machine tension settings.
Ensure your fabric and stabiliser are secure. If your hoop is not tight, your fabric may move, causing uneven stitches and distortion.
Try creating a sample design on some offcuts.
Step 5: Stitch the Placement Line
This will show where to place your fabric. The Embroidery Machine will stitch around the stabiliser.
Ensure your fabric is placed over the line.
Ensure your fabric is stitched in the right position. If your fabric is not even, you may get gaps around the design or messy edges.
Step 6: Secure the Fabric with Tack-Down Stitches
Once your fabric is in the right position, you can add the tack-down stitches. This will hold your patch in place whilst the machine stitches.
Ensure your fabric doesn’t move.
If your design needs trimming before embroidering, stop the machine at the point indicated. Gently cut away the excess fabric using applique scissors. Be careful not to cut the placement or tack-down stitches.
Step 7: Embroider the Main Design
Now let your machine stitch.
The machine will stitch the design according to the digitised design. Follow the colour order and change your thread as needed.
Whilst your machine is working, watch out for:
- Any broken threads.
- Loose stitches.
- Fabric movement.
- Incorrect tension.
- Misalignment.
If there are any issues, stop your machine and follow the instructions for your machine.
Don’t rush this part. Even stitches will give you a neater patch.
Step 8: Stitch the Outer Border
This will give your embroidered patch a clear shape. It will also help cover the cut edges.
A satin stitch is commonly used to create a thick and smooth edge. The digitised design should ensure the outer border is stitched at the right time. Usually after your main design and trimming.
Ensure you are covering the edge of your fabric. Don’t cut into the main design.
You can choose a thread colour to match your design or use a contrasting colour to make your patch stand out.
Step 9: Remove the Patch and Trim Excess Material
Once your embroidery has finished, remove your hoop from the machine. Carefully remove your patch.
Use sharp scissors to cut away any excess fabric around your border. Take your time and ensure you have left enough room to protect your embroidery.
Check your patch for:
- Loose threads.
- Uncut fabric.
- Uneven edges.
- Missing stitches.
- Stabiliser showing.
Remove any loose fibres. Check your patch from the front and back. It should have an even edge and be stable.
Step 10: Finish the Edges and Add Backing
Depending on the material, you can use an appropriate sealer or a careful cutting method. If using synthetic materials, you may need specialist heat-cutting equipment. Always follow the equipment and material guidelines. Don’t use an open flame to seal edges.
Depending on how you want to use your patch, choose your backing.
- Iron-on backing: uses heat-activated glue. Follow the manufacturer’s instructions for the temperature and pressure.
- Sew-on backing: a reliable option if you need to stitch your patch to clothing, bags, or uniforms.
- Velcro backing: uses a hook-and-loop backing. This can be easily removed and replaced. Great for backpacks, tactical-style items, workwear, and accessories.
- Adhesive backing: Choose a suitable fabric glue. Ensure it is compatible with your patch.
Your embroidered patch is now ready to use!
How to Make Different Types of Embroidered Patches
There are a few different styles of patches you can create using an Embroidery Machine. Choose the right option based on your design, purpose, and how you want to attach.
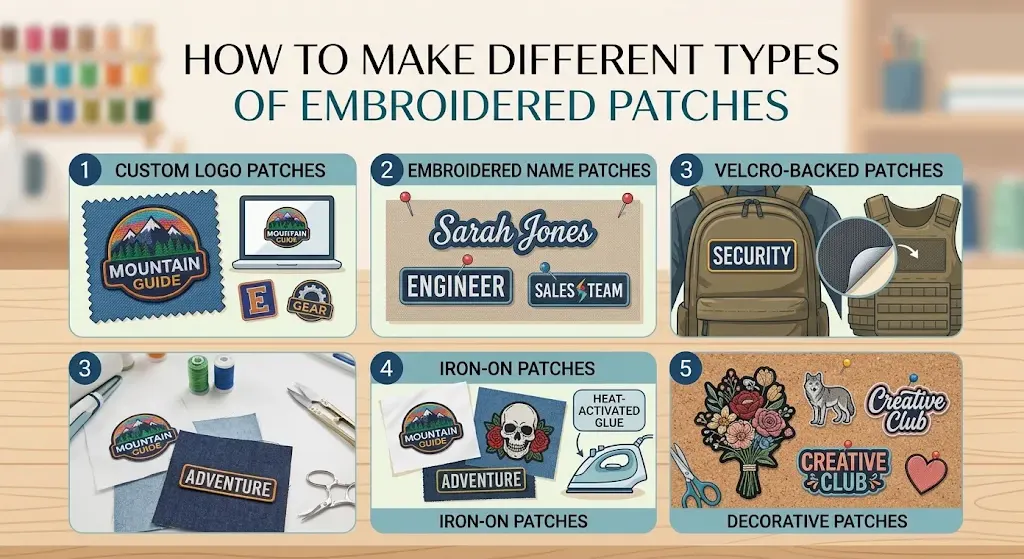
1. Custom Logo Patches
These are commonly used by businesses, clothing brands, schools, and organisations. They will display your brand name, symbol, or design.
Ensure your text is clear and thread colours are appropriate.
2. Embroidered Name Patches
Embroidered Name Patches are great for staff uniforms, schools, clubs and workwear. They can display a person’s name, role, or department.
Ensure your text is easy to read. Don’t use too small a font.
3. Velcro-Backed Embroidered Patches
These use a hook-and-loop backing. One side will be attached to your patch and the other to your garment/ accessory.
This means they are easy to remove or replace.
Great for backpacks, jackets, uniforms, and tactical-style accessories.
4. Iron-On Embroidered Patches
These use heat-activated glue on the back. Simply follow the manufacturer’s instructions for the pressure when attaching to suitable fabrics.
They are popular for personalising denim jackets, shirts, bags, etc.
Decorative Patches
These can include flowers, animals, symbols, text, and creative designs. Great for fashion projects, crafting, and personal accessories.
Common Mistakes to Avoid When Making Machine Embroidery Patches
If you’re using a good-quality embroidery machine but aren’t getting good results, then it’s likely you’re using the wrong materials or settings. Knowing the common mistakes can help you create better-quality patches.
- Using the wrong stabiliser: Using a weak stabiliser may cause your fabric to move during stitching. Choose a stabiliser suitable for your fabric and stitch density.
- Incorrect hooping: Your fabric may move, causing wrinkles and distortion. Ensure your fabric is secure.
- Poor digitising: Using the wrong stitch order will cause uneven borders and unwanted gaps. Use a patch-specific embroidery file.
- Choosing very small text: Tiny text may be hard to read. Keep your text simple and suitable for your patch size.
- Cutting too close to the stitches: Don’t cut into your border. Use sharp scissors and take your time.
- Ignoring thread tension: Incorrect tension may cause loose stitches, broken threads, and uneven embroidery. Try testing your settings.
- Using unsuitable backing: Your patch may not attach correctly. Choose a sew on, iron on or Velcro backing depending on your needs.
Tips for Making Professional-Quality Embroidered Patches
To improve your results, focus on the small details.
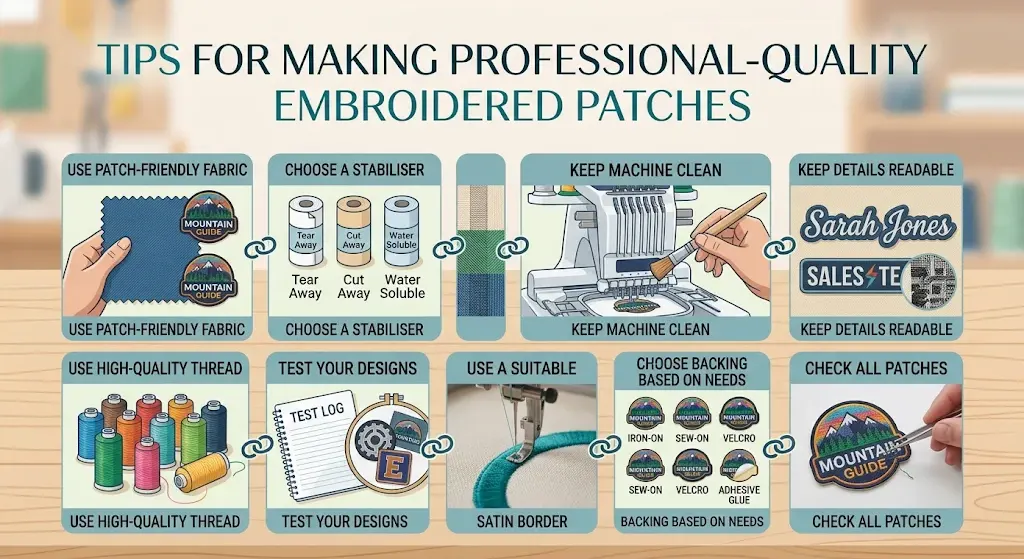
- Use a patch-friendly fabric such as polyester twill.
- Choose a stabiliser based on your design and fabric.
- Ensure your Embroidery Machine is clean.
- Use high-quality embroidery thread.
- Test your new designs.
- Keep text and small details easy to read.
- Use a suitable satin border.
- Choose a backing based on your needs.
- Check all your patches.
If you are creating patches for customers, test samples and keep the sizes, colours, and finishing to a standard.
Is Making Your Own Embroidered Patches Better Than Ordering Custom Patches?
You can customise your patches using an embroidery machine. This is handy for small-scale personal/hobby projects, sample designs, and low-volume runs.
If you require high volumes, intricate artwork, or a consistent commercial finish, then it may be more practical to order custom embroidered patches in the UK.
| Making patches yourself | Ordering custom patches |
|---|---|
| Requires an embroidery machine | No machine required |
| You control the stitching process | Professional production service handles the work |
| Suitable for learning and small projects | Suitable for larger orders |
| Requires supplies and digitising skills | Design and production support may be available |
| Production time depends on your equipment | Production time depends on the supplier |
Final Thoughts
Learn How to Make Patches with an Embroidery Machine. Choose the correct materials, then design, set up, and stitch your design before finishing off the edges.
The quality of your finished patch will depend on how well you prepare your materials. Ensuring you have the correct fabric, stabiliser, thread, and backing will help. Start with a simple design so that you can test your machine settings. With every project, you will get better at creating patches.
If you want to create embroidered name badges, custom logo patches, pretty designs, or Custom Velcro Patches, Embroidered Name Patches, you will get great results if you follow the correct process. Alternatively, if you require more patches or want them to look really professional, you could look into having custom patches made.

0 Comments on “How to Make Patches with an Embroidery Machine: A Complete Step-by-Step Guide”